 If you are using our iOS and Android applications, you are able to receive notifications directly to your phone - free of charge - as long as your device is connected to the Internet.
And here's how you can set up contacts, push notifications and Google cloud messaging notifications on your iOS and Android devices:
If you go to the notifications section of your account*, there are two possible options to choose from - Summary Notifications and Device Contacts.
Summary Notifications
Once you install the iOS or Android application on your device, you need to log in using your credentials. Your device ID will then appear in the current status summary notifications section.
If you decide to use this option, you will be alerted every time when the status of a target changes. You can select the targets for which you want to be alerted, and you will only get notified when they experience any problems.
To activate the summary notifications, you need to click on the edit icon on the right hand-side, next to the device in question.
In this section you can enter labels for your devices so you will know which device to configure. To enable the push notifications, you just have to check the checkbox next to the device in question and click the update devices button. You should also make sure that you have allowed our application to receive notifications. You can send test alerts from this section just to make sure that everything is configured properly.
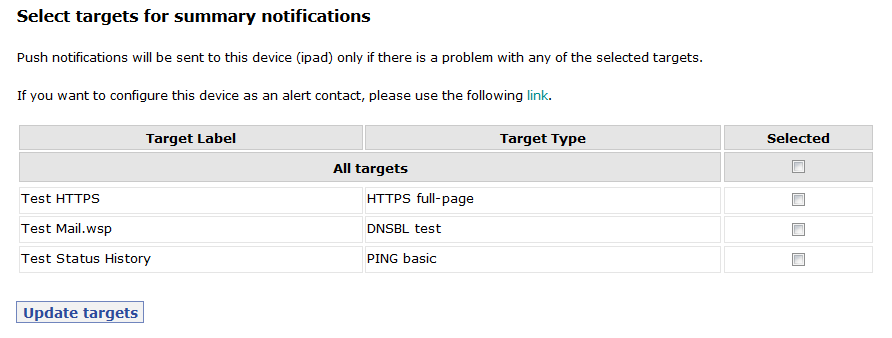
The select targets icon allows you to choose the targets you want to receive notifications for.
Do not, however, forget to press the update targets button in order to save your desired configuration.
The screenshots here show how to configure iOS push summary notifications, but the same steps apply to the setup of Android GCM summary notifications.
Device Contacts
The second option is to create device contacts:
In order to use this option, first you have to enable the push notifications for the specific device following the instructions above. If you do not want to receive any summary notification after you enable the push notifications simply disable all the targets from the select target section.
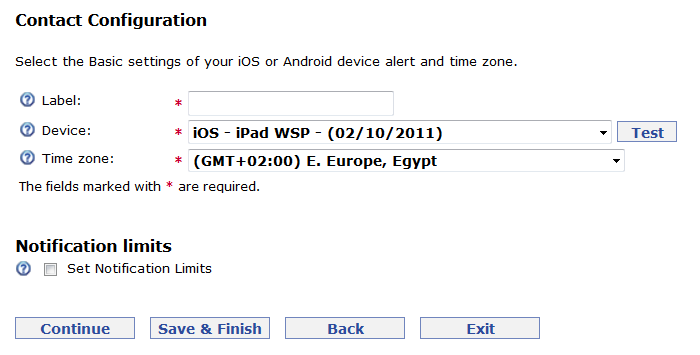
If you follow the create new contact link,
you will go to the contact configuration wizard. In the label text field, enter the name of the contact you want to create. From the device drop down menu, you can select the device that will receive the notifications. You should choose the correct time zone of the contact and you can also set daily, weekly and monthly limits of the number of notifications the contact will receive.
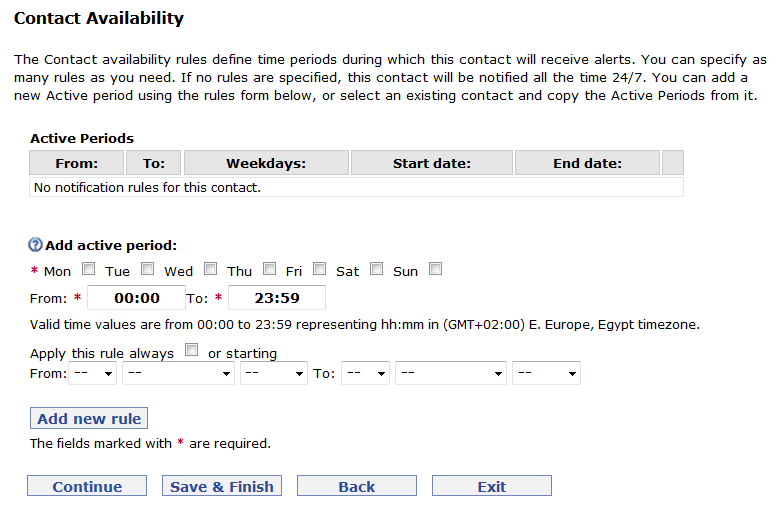
Once you do that, click continue and you will go to the contact availability section.
Here you can choose the time periods during which the contact will be notified. For example, you can configure the contact to receive notifications Monday through Friday during work hours only. You can also select a period when these rules will be active (i.e. 12/01/2013 to 12/31/2013). If you do not add any rules, the contact will receive alerts 24 hours per day, every day.
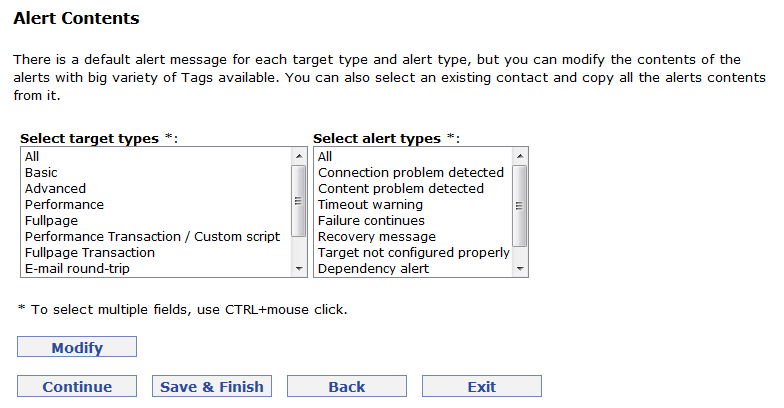
When you click continue you will go to the Alerts contents section.
Here you can customize the content of the alerts. There are plenty of different options here, and we will soon post an article covering just the alert contents.
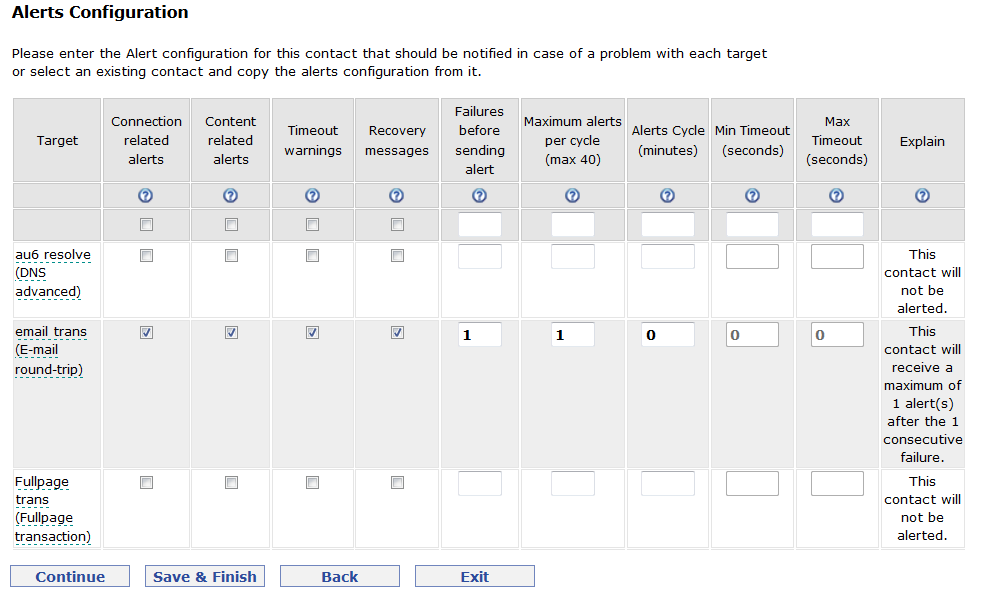
When you click continue, you will go to the alerts configuration section.
There are four different types of notifications you can set to receive:
- Connection related alerts – we will notify you if we detect any problems with the connection to your servers.
- Content-related alerts – You will be alerted if we detect a 404 error, for example, or if we are not able to find the keywords you set for our monitoring agent to look for.
- Timeout warning – you will receive such alerts when it takes longer than usual to open a web site for example.
- Recovery messages – these notifications are sent when the target status changes back to OK.
If you set the failures before sending alerts to 2, you will be notified when we detect two consecutive failures.
Тo receive just one alert when we detect problems with a specific targe,t you should keep the maximum alerts per cycle value to 1. For more alerts, you simply increase that number.
The alert cycle will restart the procedure after the specified minutes if your site is down for a longer period of time.
Once you set the alerts configuration for the desired targets, you can click save and finish, and you will be done with the configuration of the contact.
*If you do not have an account with us yet, sign up for a 30-day free trial to test all our services absolutely free for one month.




 Copyright 2000-2024, WebSitePulse. All rights reserved.