I have already reviewed the test tools extension and the transaction recorder extension, so I’m not going to introduce you to WebSitePulse Current Status Chrome Extension. Once you have installed it, you should be able to see its icon on the top right-hand corner of your browser:

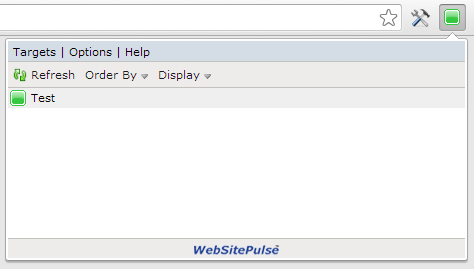
So basically once you configure the extension, you will be able to see the targets in your account status directly from this plugin. If you want to see the most current status, you need to press the Refresh button.
The Display button will allow you to display all the targets you have configured in your account or only the active ones. The extension can only show the targets that are down right now or are OK. You can only view the suspended targets or the targets with a warning status.
The last available option is to view the targets data that is down and the targets that have a warning status only. There are two options for the order of the targets – Label and Status. If you go with the Oder by label option, the targets will be shown in an alphabetical order. If you go with the Order by status option, we will show the down targets first, then the targets with a warning status, then targets that are OK, and lastly the suspended targets.
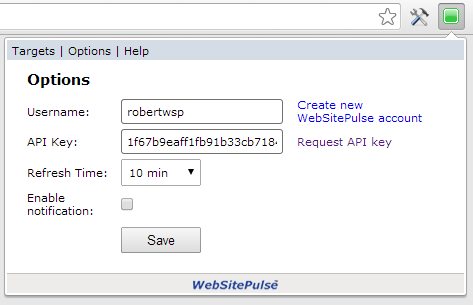
In order to configure the correct credentials for this extension, you have to click on the Options button:

You have to enter your username and your account's API key. If you do not have an account with us, follow the Create New WebsitePulse account and sign up for our 30 days free trial.
To get your API key, simply click on the Requst API key link. If you are not logged into your online control panel, you will be asked to do so first.
Once you fill in those details, you will have to select the refresh time interval for the specific extension. You can choose from 4 different refresh intervals: 10 min, 15 min, 30 min and 1 hour.
In order to be notified when any of your targets change their status, you should enable the notifications. Just remember to click Save at the end so that your settings’ changes are recorded correctly.
The Help button will give you some additional information regarding this specific extension.
So far I have shown you how to install and use our three different Chrome extensions, so now I'm moving on to how to remove them.
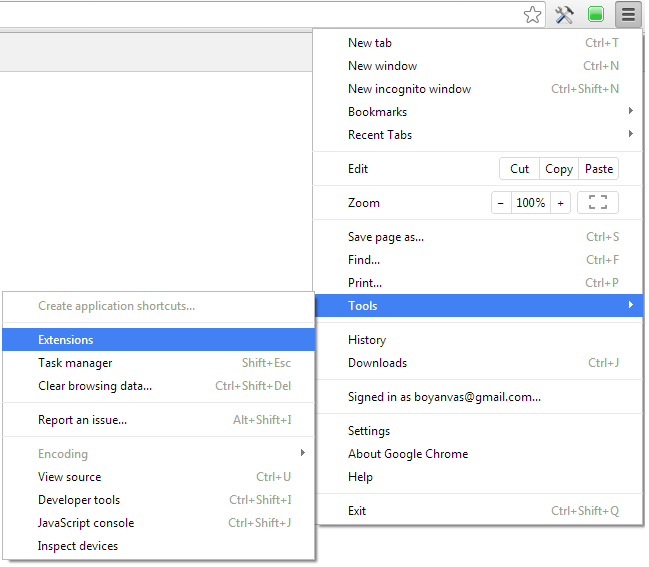
Go to the Chrome menu and then go to Tools:

Choose Extensions:

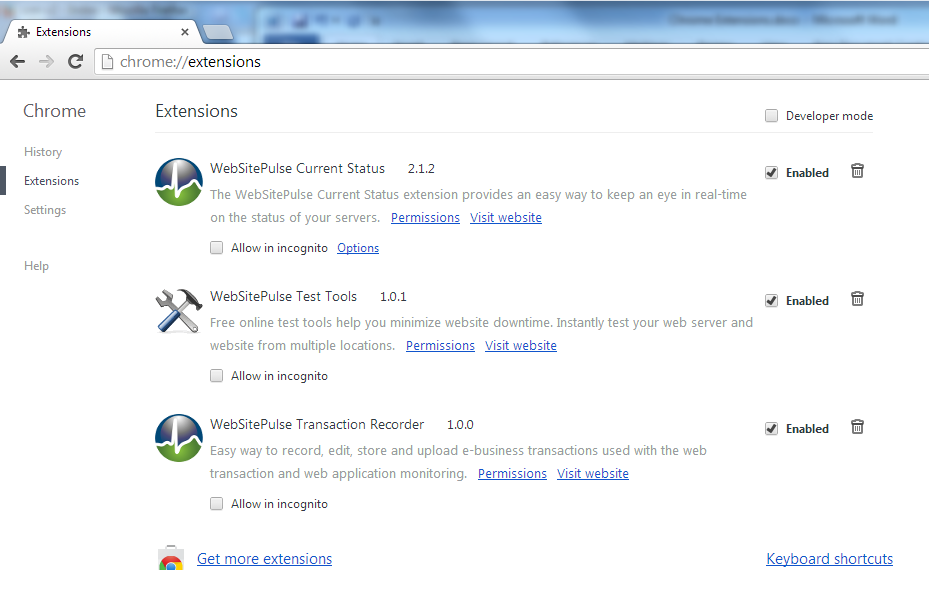
If you don't want to remove the extension completely but only the icon, you can enable and disable the extensions from here.
You can also permanently delete the extensions by pressing the Delete icon next to them. When you disable them, they do not use any resources, so you do not have to permanently delete them if you intend to use them in the future.
We also offer similar extensions for Firefox, Internet Explorer, Opera and Safari browsers. I will be reviewing those solutions soon.
If you are interested in having such useful tools on your mobile devices, you should check out our Android and iOS applications as well.


 Copyright 2000-2026, WebSitePulse. All rights reserved.